How to make DIY Halloween Costumes
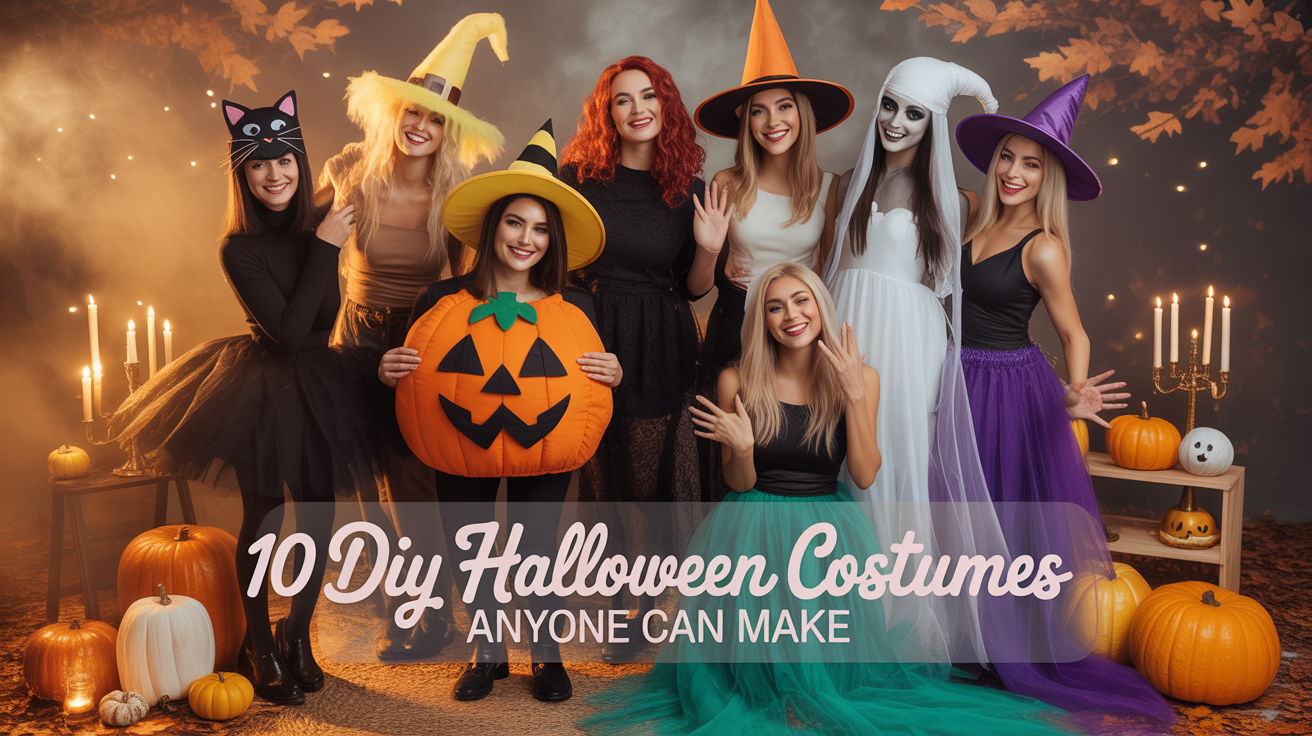
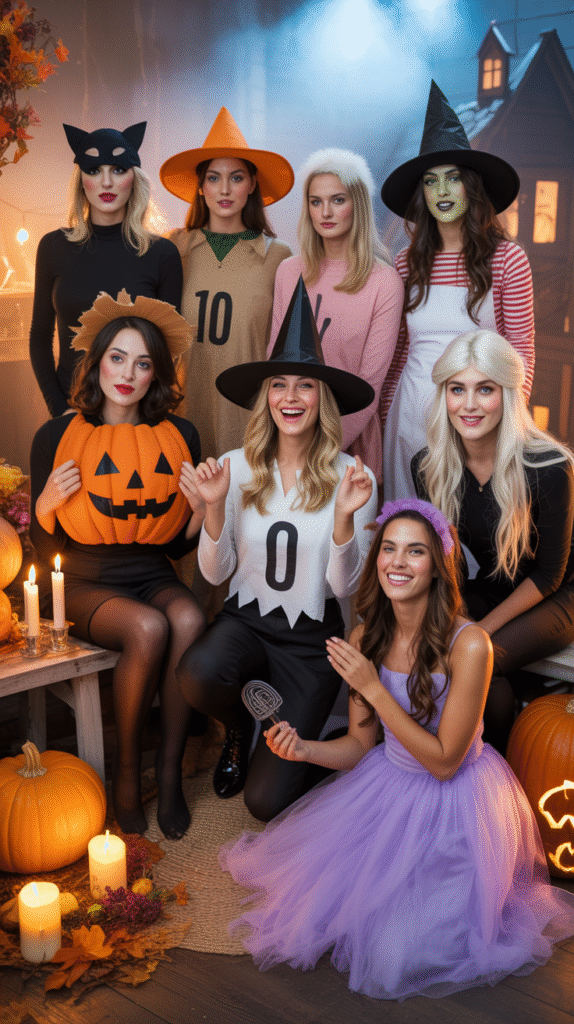
Halloween is right around the corner, and if you’re like most of us, you’ve probably thought: “Do I really want to spend $50+ on a costume I’ll only wear once?” The good news? You don’t have to. 🎃
DIY Halloween costumes are not only budget-friendly, they’re also so much more fun and personal. With just a few basics you already own — think black jeans, a white tee, or a plaid shirt — you can pull together something creative and totally party-ready in no time. Add a little makeup, some easy accessories, and you’ve got a costume that looks amazing without breaking the bank.
In this post, I’ve rounded up 10 simple, beginner-friendly Halloween costumes that anyone can make — even last-minute. These ideas are quick, affordable, and perfect for adults or teens who want something cute, spooky, or fun without the stress of shopping the crowded costume aisles.
So grab your favorite comfy outfit, a few supplies, and let’s turn everyday pieces into Halloween magic. ✨
This website contains affiliate links. Some products are gifted by the brand to test. As an Amazon Associate, I earn from qualifying purchases. The content on this website was created with the help of AI.
Why DIY Halloween Costumes? 🎭
Sure, buying a costume off the rack is easy… but where’s the fun in that? DIY Halloween costumes give you the chance to be creative, save money, and show off a look that feels totally you. Here’s why they’re such a great option:
💸 Budget-Friendly
Store-bought costumes can get pricey fast, especially if you’re dressing up the whole family. DIY options let you use clothes you already own and add just a few affordable accessories. That means more money left over for candy (the real Halloween MVP, right?).
✨ One-of-a-Kind Looks
No one wants to walk into a party and see three other people in the exact same costume. With DIY, you can customize every detail — from the color of your shirt to the way you style your makeup — so your outfit is truly unique.
👨👩👧 Family + Group Fun
DIY costumes are perfect for families or friends who want to coordinate without spending a fortune. Think scarecrow families, black cats with witches, or even a spooky skeleton squad. It’s a fun way to get creative together.
⏱ Last-Minute Friendly
Let’s be honest: not everyone plans Halloween weeks in advance. (No judgment here!) DIY costumes can be pulled together quickly with things from your closet or a quick Amazon order. You’ll be party-ready in no time.
DIY costumes aren’t just about saving money — they’re about making Halloween fun, personal, and stress-free. And that’s exactly what the next 10 ideas are designed to help you do. 🎃✨
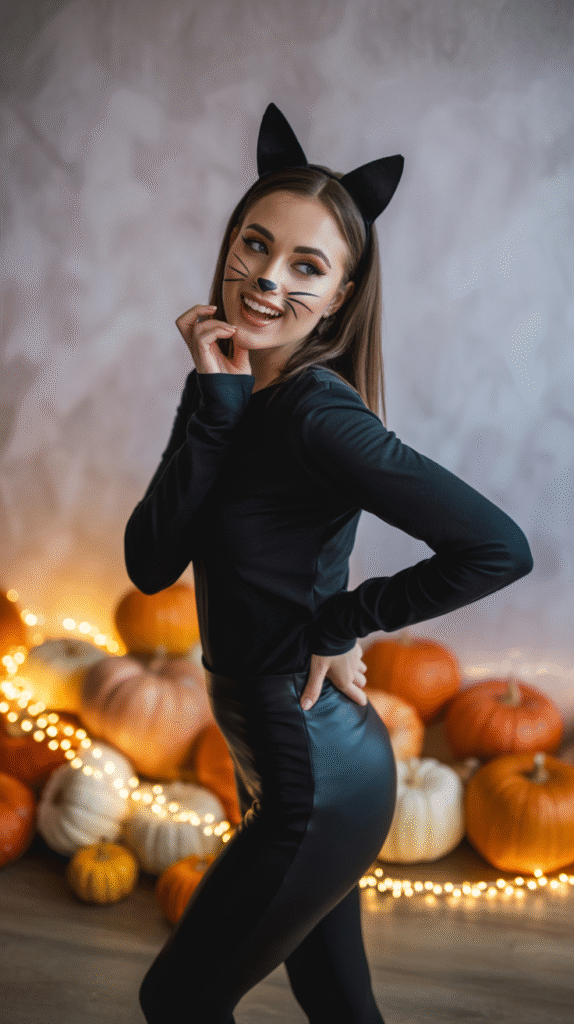
Costume #1 — The Classic Black Cat 🐾
Skill Level: Beginner
Time Estimate: 15–20 minutes
Best For: Last-minute costumes, teens, adults, and Halloween parties.
Supplies You’ll Need
- Black Cat Ear Headband
- Black Long-Sleeve Top
- Black Leggings or Skinny Jeans
- Eyeliner for Whiskers & Nose
- Clip-On Cat Tail (optional)
Step-by-Step Instructions
- Dress in Black: Start with a black long-sleeve top and black leggings or jeans — the base of your cat look.
- Add Accessories: Pop on your cat ears headband and attach a clip-on tail (optional but super cute).
- Makeup Magic: Use black eyeliner to draw a little cat nose and three whiskers on each cheek. Add winged eyeliner for a dramatic touch.
- Finishing Touches: Slip on black shoes or boots, and you’re officially Halloween-ready.
Pro Tips
- For a glam cat look, add sparkly eyeshadow or glitter whiskers.
- Pair with a faux-leather jacket for an edgier vibe.
- If you’re going to a party, bring your eyeliner with you for quick touch-ups.
Design Inspiration
- Cute + playful: Pink blush, glittery cat ears.
- Glam: Smoky eyes, rhinestone whiskers.
- Spooky: Dark lips, long eyeliner whiskers.
Common Mistakes to Avoid
- Forgetting the whiskers — they’re what make the outfit instantly recognizable as a cat.
- Wearing mismatched black tones — stick to similar shades for a sleek look.
- Overcomplicating the makeup — simple whiskers + nose = easy and effective.
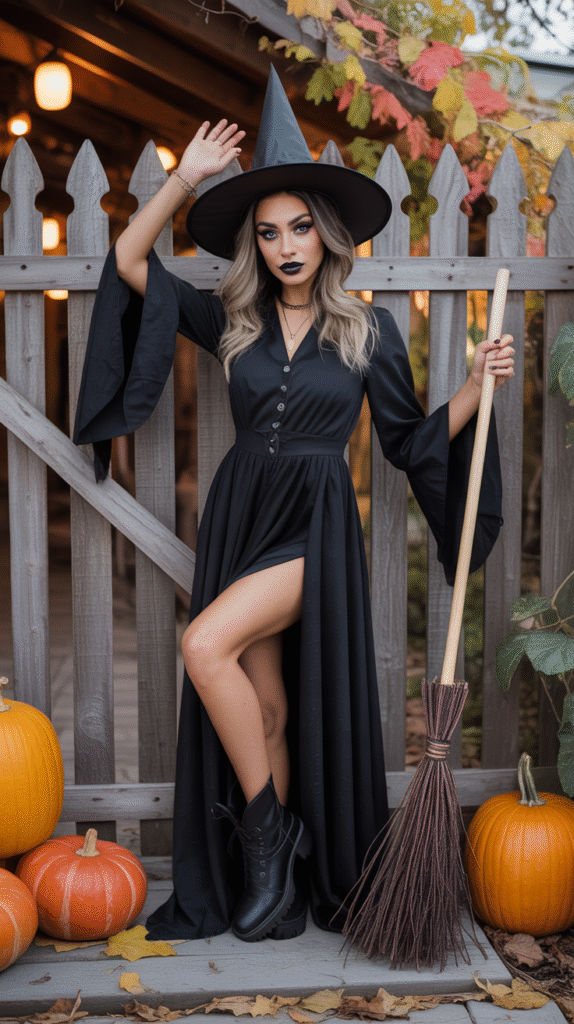
Costume #2 — The Classic Witch 🧙
Skill Level: Beginner
Time Estimate: 20–30 minutes
Best For: Adults, teens, and anyone who wants a spooky-but-easy costume.
Supplies You’ll Need
- Black Dress (long or short, any style works)
- Witch Hat
- Black Boots
- Broomstick Prop (optional but fun!)
- Dark Lipstick
- Eyeliner for Bold Cat-Eye
Step-by-Step Instructions
- Start with the Basics: Slip into a black dress — this is the heart of your witchy look. Any length or style works, but flowy is extra dramatic.
- Add Your Hat: Pop on your pointy witch hat — no witch is complete without it.
- Boots & Accessories: Pair your dress with black boots or heels. Carry a broomstick if you want a playful prop.
- Makeup Magic: Go bold with eyeliner and add dark lipstick. Smoky eyeshadow makes you look extra mysterious.
- Optional Add-On: Add a black cape or shawl for more drama.
Pro Tips
- Choose a dress you already own to keep this costume budget-friendly.
- If you don’t have a broom, carry a black handbag or a spellbook (DIY with a notebook and black paint!).
- Add fishnet tights or striped socks for a playful twist.
Design Inspiration
- Glam Witch: Sparkly dress, glittery makeup, and dramatic lashes.
- Classic Witch: Flowing black dress, simple hat, and broomstick.
- Spooky Witch: Dark lipstick, pale foundation, and a creepy vibe.
Common Mistakes to Avoid
- Skipping the hat — it’s the most recognizable part of the witch look.
- Over-accessorizing — keep it simple for maximum effect.
- Choosing uncomfortable shoes — you’ll regret it halfway through the night.
Costume #3 — DIY Scarecrow 🌾
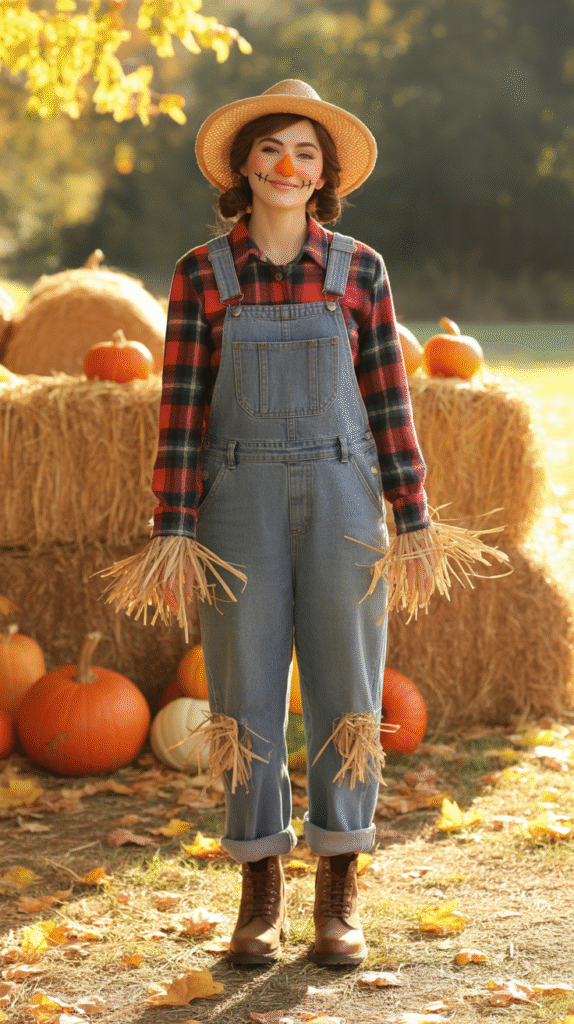
Skill Level: Beginner
Time Estimate: 20–30 minutes
Best For: Adults, teens, kids, and family costumes.
Supplies You’ll Need
- Plaid Flannel Shirt
- Denim Overalls or Jeans
- Straw Hat
- Makeup Palette for Nose & Stitch Marks
- Hay/Straw Accent Props (optional, can tuck into sleeves and pockets)
- Brown Boots
Step-by-Step Instructions
- Base Outfit: Start with a plaid flannel shirt and denim overalls (or jeans if you don’t have overalls).
- Add Hat: Pop on a straw hat for that instant scarecrow vibe.
- Makeup Details: Use orange face paint (or lipstick) to color the tip of your nose. Add sttched “smile” lines with black eyeliner across your cheeks and mouth.
- Extra Details: Tuck bits of hay or raffia into your shirt cuffs, collar, and pockets for authenticity.
- Shoes: Finish the look with brown boots or any farm-style shoes.
Pro Tips
- If you don’t have hay, use strips of raffia or even yellow yarn for the same effect.
- Pair with a basket of faux pumpkins for a cute prop.
- Works great as a couple or group costume with other “farm” looks like farmer, cow, or pumpkin.
Design Inspiration
- Cute Scarecrow: Bright blush cheeks, pigtails, and playful makeup.
- Rustic Scarecrow: Faded denim, simple hat, and minimal makeup.
- Spooky Scarecrow: Darker face paint, ripped clothing, and creepy stitches.
Common Mistakes to Avoid
- Overloading with hay — it gets itchy fast, so just add accents.
- Forgetting to blend makeup — soft blush and stitches look more polished.
- Wearing uncomfortable shoes — go practical since scarecrows are “farm ready.”
Costume #4 — DIY Mummy 🪦
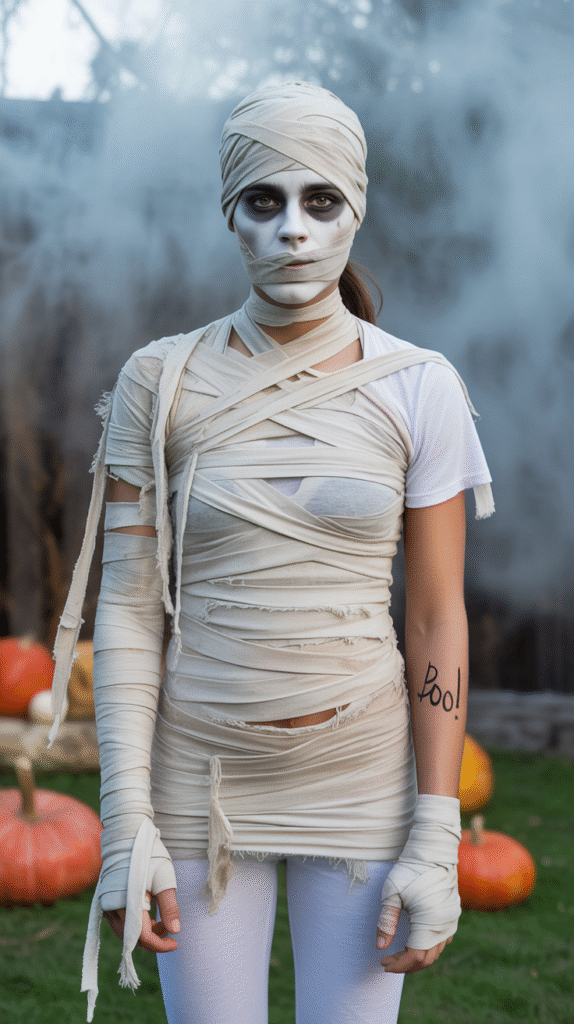
Skill Level: Easy
Time Estimate: 30–45 minutes
Best For: Adults, teens, and kids who want a spooky but simple look.
Supplies You’ll Need
- White Long-Sleeve Shirt & Leggings
- White Gauze Bandages or Fabric Strips
- Fabric Scissors
- Dark Eyeliner (for smoky eyes and shadows)
- White Face Paint (optional for a pale effect)
- Safety Pins (to secure fabric strips)
Step-by-Step Instructions
- Base Outfit: Put on your white shirt and leggings for comfort and coverage.
- Wrap It Up: Tear fabric into strips or use pre-bought gauze bandages. Wrap loosely around arms, legs, and torso, securing with pins.
- Leave Gaps: Don’t cover everything — leaving some skin or the base outfit visible adds dimension.
- Makeup: Smudge dark eyeliner around the eyes to give that tired, ancient-mummy vibe. Add pale face paint for extra effect.
- Final Touch: Fray the ends of your bandages for a more authentic, worn look.
Pro Tips
- Use an old white sheet instead of buying new fabric — budget win!
- Secure strips with hidden safety pins to avoid unwrapping mid-party.
- Add tea or coffee stains to fabric for a more aged, creepy mummy style.
Design Inspiration
- Cute Mummy: Neat wraps, light makeup, and playful vibe.
- Scary Mummy: Torn bandages, darker eye makeup, and frayed edges.
- Glow Mummy: Add glow sticks under gauze for a cool night effect.
Common Mistakes to Avoid
- Wrapping too tightly — it should be comfy and breathable.
- Skipping makeup — eyeliner and shadows make the costume pop.
- Using only toilet paper — it rips too easily; fabric or gauze lasts longer.
Costume #5 — DIY Vampire 🩸
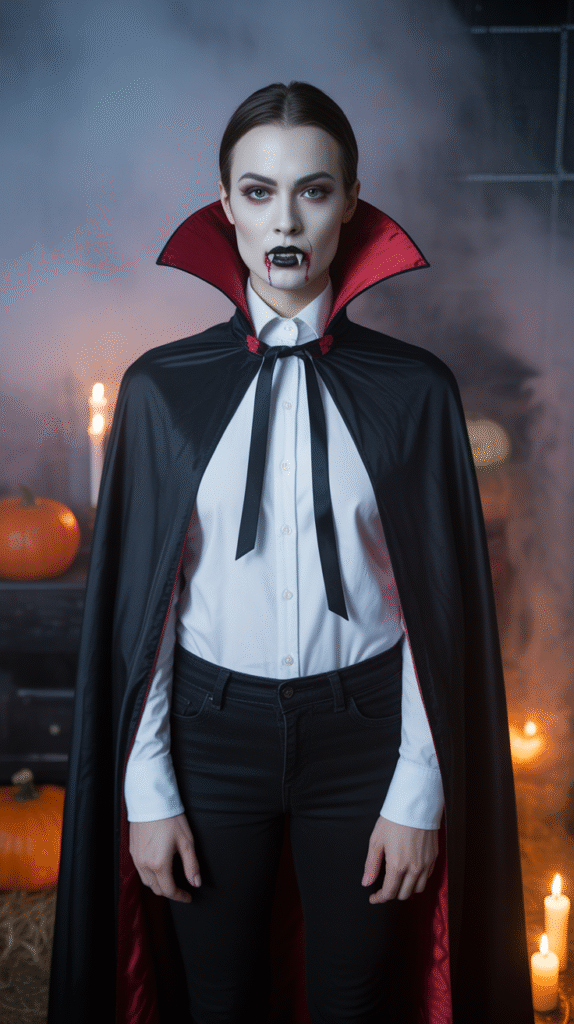
Skill Level: Beginner
Time Estimate: 20–30 minutes
Best For: Adults, teens, and couples who want a spooky, elegant Halloween look.
Supplies You’ll Need
- Black Cape with Collar
- Fangs
- White Button-Up Shirt
- Black Pants or Skirt
- Fake Blood
- Dark Lipstick & Eyeliner
Step-by-Step Instructions
- Outfit Base: Put on the white shirt tucked into black pants (or skirt). Keep it clean and sharp for that aristocratic vampire vibe.
- Add the Cape: Secure a black cape with a dramatic collar — the statement piece of the costume.
- Makeup: Apply dark lipstick, pale powder, and eyeliner for sharp features. Smudge a little fake blood at the corners of your mouth for drama.
- Fangs: Pop in vampire fangs for the finishing touch.
- Optional Accessories: Carry a goblet of “red wine” (cranberry juice works!) or wear red jewelry for flair.
Pro Tips
- Use a touch of contouring to create hollow cheeks — gives a more undead look.
- Pair with a partner in a witch, ghost, or bat costume for couple inspo.
- Fangs sometimes slip — try denture adhesive for better hold.
Design Inspiration
- Classic Dracula: Slicked-back hair, red-lined cape, and sharp eyeliner.
- Modern Vampire: Messy hair, leather jacket instead of cape, subtle makeup.
- Gothic Glam: Dark velvet dress, lace gloves, and blood-red lipstick.
Common Mistakes to Avoid
- Skipping makeup — fangs alone won’t complete the look.
- Using too much fake blood — a little goes a long way.
- Forgetting accessories — jewelry or props elevates the costume fast.
Costume #7 — DIY Zombie 🧟
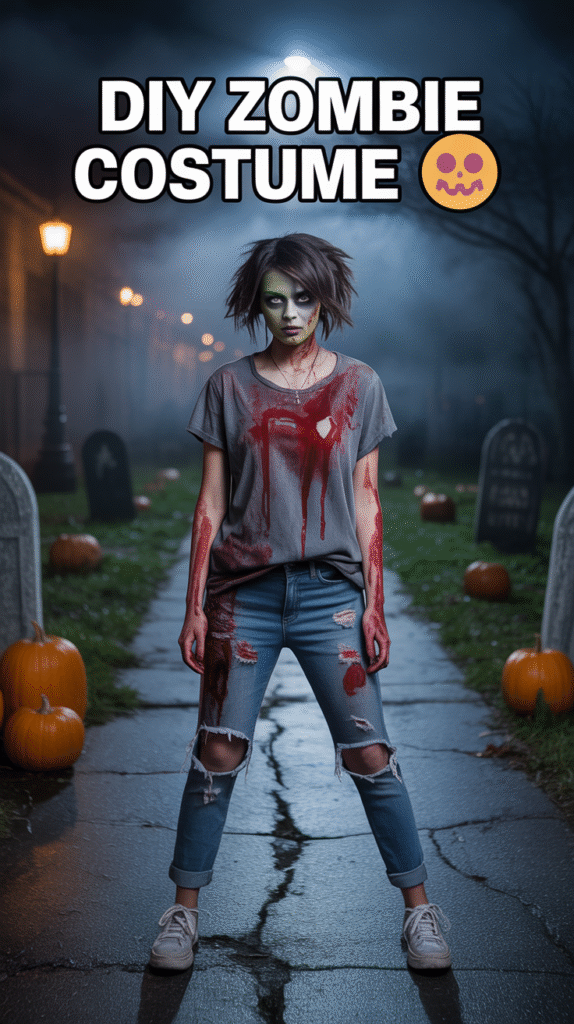
Skill Level: Beginner
Time Estimate: 30–45 minutes
Best For: Adults, teens, and kids who love a creepy, classic Halloween vibe.
Supplies You’ll Need
- Old T-Shirt or Hoodie (distressed)
- Old Jeans or Pants
- Fake Blood
- Gray or Green Face Paint
- Dark Eyeshadow Palette
- Scissors (for distressing clothes)
Step-by-Step Instructions
- Distress the Clothes: Cut small holes and fray the edges of your shirt and jeans. Rub a bit of dirt or brown eyeshadow on the fabric for a worn effect.
- Base Makeup: Apply gray or green face paint for a “lifeless” skin tone.
- Dark Circles: Use dark eyeshadow around your eyes and under your cheekbones to create a sunken look.
- Add Fake Blood: Drip fake blood around your mouth, hands, and shirt for a gruesome touch.
- Final Details: Mess up your hair — the wilder, the better. Add contact lenses if you want to go all-in!
Pro Tips
- Use old clothes you don’t mind ruining — fake blood stains!
- Add texture with coffee grounds or flour for a “decayed” effect.
- If you’re taking photos, use cool lighting or shadows for extra spook factor.
Design Inspiration
- Classic Zombie: Gray makeup, fake blood, ripped clothes.
- Glam Zombie: Add glitter or rhinestones to makeup for a “pretty but creepy” twist.
- Funny Zombie: Pair with a silly shirt like “Just woke up like this.”
Common Mistakes to Avoid
- Overdoing fake blood — it can look messy and unrealistic.
- Forgetting to blend face paint — smoother application looks more pro.
- Wearing new clothes — they’ll likely get stained or ripped.
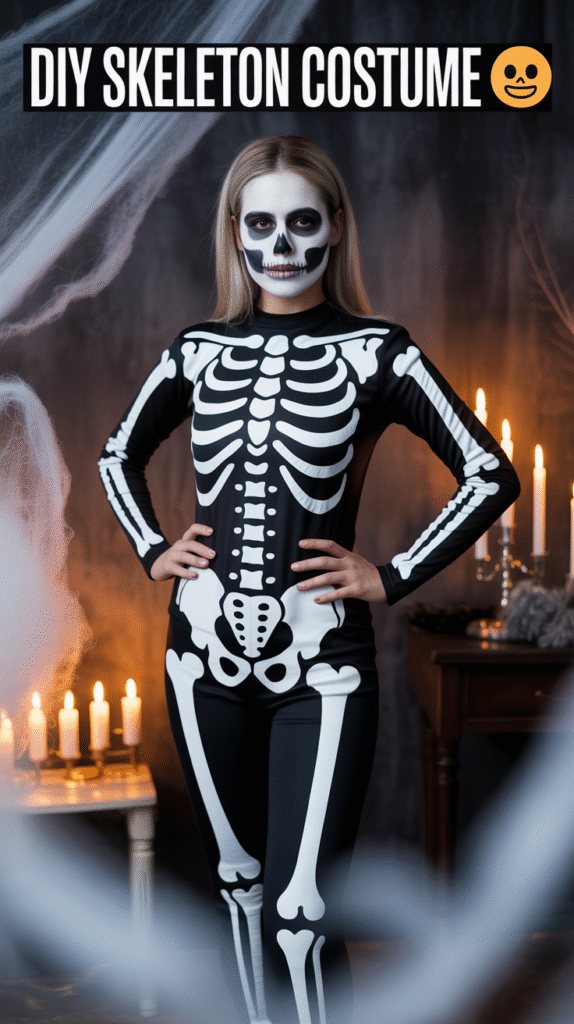
Costume #8 — DIY Skeleton 💀
Skill Level: Beginner
Time Estimate: 30 minutes
Best For: Adults, teens, or kids who want a spooky yet simple Halloween costume that stands out in photos.
Supplies You’ll Need
- Black Long-Sleeve Shirt & Leggings Set
- White Fabric Paint or Iron-On Vinyl
- Skeleton Stencil (optional)
- White Face Paint
- Black Eyeliner
- Makeup Brushes or Sponges
Step-by-Step Instructions
- Prep the Outfit: Lay out your black shirt and leggings flat on a table.
- Create the Bones: Use fabric paint (or vinyl) to draw white bone shapes along the sleeves, torso, and legs — or use a skeleton stencil for even results.
- Let It Dry: Allow the paint to dry completely before wearing (check instructions on your paint or vinyl).
- Makeup: Apply white face paint as a base. Use black eyeliner to hollow out the eyes, nose, and jaw for a skull look.
- Final Touch: Add some shimmer or glitter for a glam skeleton twist!
Pro Tips
- If you don’t want to paint, use iron-on vinyl or even cut white felt pieces and glue them on.
- Add glow-in-the-dark paint for a fun, nighttime costume.
- Pair with skeleton gloves or a black beanie for a finished look.
Design Inspiration
- Classic Skeleton: Black and white bones, full skull makeup.
- Glam Skeleton: Add rhinestones or glitter for a chic, Pinterest-perfect vibe.
- Family Skeletons: Everyone wears matching skeleton sets — adorable for photos!
Common Mistakes to Avoid
- Applying paint too thickly — it can crack once dry.
- Forgetting to let the paint cure before wearing.
- Skipping makeup — it ties the full look together!
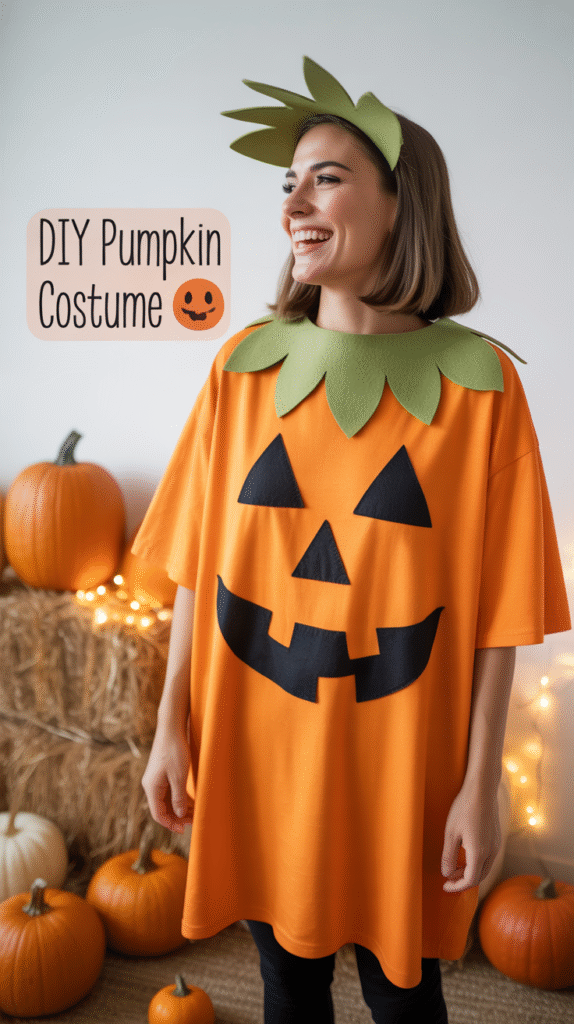
Costume #9 — DIY Pumpkin 🎃
Skill Level: Beginner
Time Estimate: 20–30 minutes
Best For: Anyone looking for a cute, fun, and low-effort Halloween costume with a festive touch.
Supplies You’ll Need
- Orange Oversized T-Shirt or Dress
- Black Felt Sheets
- Fabric Glue or Hot Glue Gun
- Green Felt or Ribbon (for stem/headband)
- Scissors
- Pumpkin Makeup Set or Orange Face Paint
Step-by-Step Instructions
- Prep the Base: Lay your orange t-shirt flat.
- Create the Face: Cut out triangle eyes, a nose, and a jagged smile from the black felt.
- Glue It On: Use fabric glue or a hot glue gun to attach the felt pieces onto the front of the shirt.
- Add the Stem: Cut green felt into leaf shapes and attach to a headband or ribbon to create a cute “pumpkin stem” accessory.
- Makeup: Apply orange blush or face paint for a pumpkin glow — add a green nose or eyeliner swirl for a fun touch.
Pro Tips
- Add a tutu or black leggings to make the outfit more polished.
- For couples — one can be a pumpkin, the other a farmer or scarecrow (super cute duo!).
- Use glitter spray for a fun, kid-friendly sparkle.
Design Inspiration
- Classic Pumpkin: Bright orange shirt, black felt face, and green leaf headband.
- Glam Pumpkin: Add gold glitter and soft curls for a Pinterest-worthy look.
- Family Pumpkins: Everyone wears their own pumpkin shirt — from baby onesies to adult tees!
Common Mistakes to Avoid
- Using too much glue (it can make the fabric stiff).
- Not securing felt edges properly — press and hold for a few seconds when gluing.
- Forgetting to test your glue first (some glues can darken fabric).
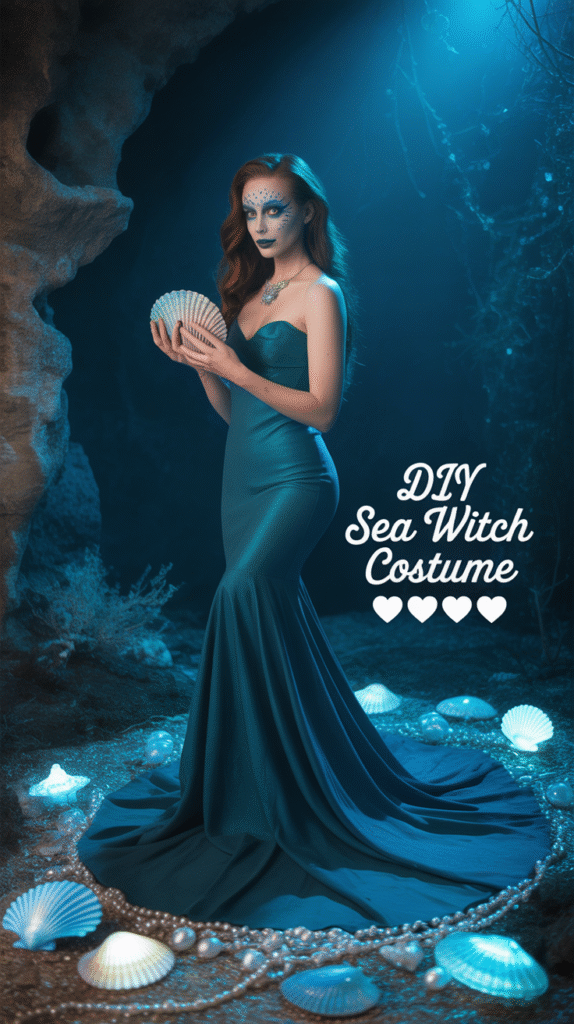
Costume #10 — DIY Sea Witch 🐚✨
Skill Level: Intermediate (still easy with basic supplies!)
Time Estimate: 45 minutes – 1 hour
Best For: Anyone who loves a mystical, glam, ocean-inspired costume — perfect for Halloween parties or themed events.
Supplies You’ll Need
- Black or Deep Teal Maxi Dress
- Iridescent Glitter or Body Shimmer
- Pearl Stickers or Body Gems
- Seashell Hair Clips or Crown
- Hot Glue Gun & Glue Sticks
- Fishnet Tights (for mermaid-scale makeup trick!)
- Blue, Purple, and Silver Eyeshadow Palette
- Temporary Hair Color Spray (in teal or lavender)
Step-by-Step Instructions
- Dress the Part: Start with your base — a black, navy, or deep teal maxi dress. Anything flowy or sheer works beautifully for that ocean-swirling effect.
- Make Your Scales: Place the fishnet tights gently over your cheeks or arms and dab shimmery purple and blue eyeshadow on top — when you remove the net, you’ll have realistic “scales.”
- Accessorize: Use seashells, pearls, and gems to decorate your hair or neckline. You can glue shells to a headband to create a magical sea crown.
- Go Glam: Dust glitter on your shoulders and collarbone. Add dramatic eyeliner and metallic lipstick for an enchanting look.
- Finishing Touch: Spray a few strands of hair with blue or lavender color spray for that mystical sea magic vibe.
Pro Tips
- Layer two flowy skirts or a tulle overlay for more “underwater” movement.
- Use a black cape or shawl for a darker “witch of the sea” version.
- If you want to go full Ursula-inspired, add purple body paint or tentacle details on the hem of your dress.
Design Inspiration
- Glam Sea Witch: All-black outfit with silver shimmer, seashell jewelry, and blue hair streaks.
- Ocean Goddess: Flowy teal dress, pearl details, and mermaid-scale makeup.
- Dark Mermaid: Smoky eyes, wet-look hair, and moody blue lighting for photos.
Common Mistakes to Avoid
- Overusing glitter — a little goes a long way for shimmer without the mess!
- Skipping hair accessories — they really complete the sea-inspired look.
- Forgetting to test hair spray on a small strand first (some colors stain temporarily).
The Ultimate Guide to Baggy Jeans: HoThe Ultimate Guide to Baggy Jeans: How to Style, Wear & Rock Them in Every Seasonw to Style, Wear & Rock Them in Every Season
And there you have it — 10 fun, creative, and totally doable DIY Halloween costumes that prove you don’t need to spend a fortune to look amazing this spooky season! Whether you’re going for something cute like the Black Cat, clever like the Scarecrow, or bold and magical like the Sea Witch, there’s something here for everyone to love.
What I love most about DIY costumes is that they’re personal — you get to make them your own. Each one can reflect your style, your sense of humor, or even your favorite colors. Plus, they’re perfect for anyone who wants to stay budget-conscious without giving up creativity (and let’s be honest, those store-bought costumes can get pricey fast!).
So this year, grab a few supplies, turn on your favorite Halloween playlist, and make a little crafting magic happen. ✨ You’ll end up with something original, affordable, and totally Pinterest-worthy — all while having fun along the way.
If you try any of these ideas, tag me or share your look on Pinterest — I’d love to see how you make them your own! 💕
Happy Halloween, my stylish makers — and remember, creativity never goes out of style. 🎃🕸️
Make sure to check Best Halloween Couple Costumes for a Spooky and Stylish Night. https://theinaedit.com/best-halloween-couple-costumes-2/